I wanted to start posting some of my craft items I have made on here. Since I have not had much time lately to make stuff, being forced to stay in bed a lot, I figured I’d start featuring some of my older stuff. (This has been posted on the Cricut.com Message Boards, my forum, Photobucket, and MySpace.)
The project I am featuring today is an autograph book for Disney World! These were made for my kids before our trip in 2008, thus saving me the expense of shelling out even more money for the official Disney ones. 😀 The other perk to making your own, is that you can actually use a character your child likes. (And avoid having multiple kids mix theirs up!)
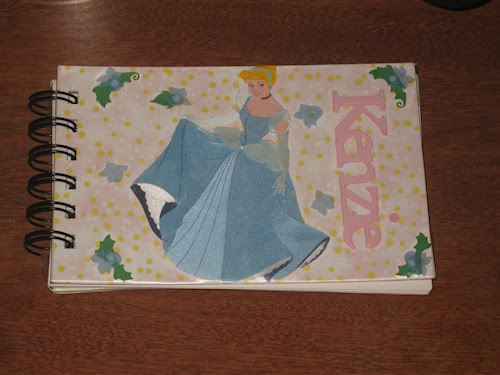
This is the front of one:
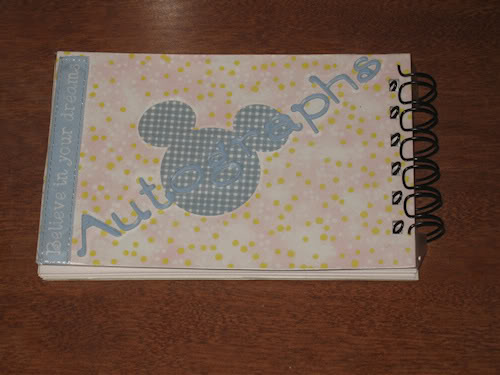
Here is the back:
Supplies/tools needed for project above:
- Cricut, Cricut Expression, or Cricut Create (by ProvoCraft)
- A Cricut font cartridge (Plantin Schoolbook was used for the personalization on front, Tear Drop for the back)
- Mickey and Friends Cricut Cartridge
- Jolee’s Cinderella sticker set (or Cricut Cartridge Happily Ever After)
- Jolee’s Princess ribbons — adhesive backed (or any other misc embellishments to decorate)
- Cricut Design Studio or Cricut Gypsy (to weld letters for front)
- Bind-it-All Machine (by Zutter) and o-wires
- Patterned paper to cover front and back covers
- paper for Mickey ears, and lettering
- Contact clear sheet
- 2 pieces of Chipboard cut 4″x6″ each
- plain white printer/copy paper cut 4″x6″ – as many pages as desired to use for autographs in your book (I would say 20 at the very least!)
- Glue Dots (or some other form of adhesive)
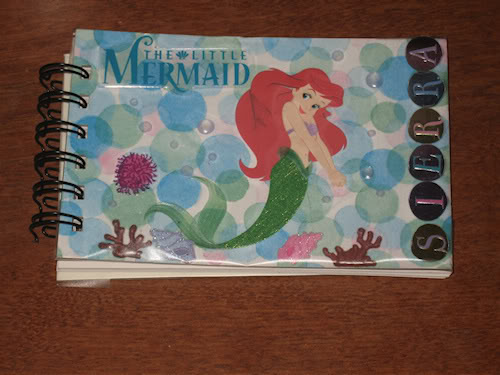
This project was done before I got the Cricut Happily Ever After cartridge, so forgive me for using the Jolee’s sticker instead for Cinderella. *LOL* (Same thing was done with the Little Mermaid one at the end.)
Directions:
- If they are not precut, cut two pieces of chipboard at 4″x6″ each. Cut two pieces of patterned paper at 4″x6″ each. Adhere one piece of patterned paper to one side only of each piece of chipboard. (The patterned sides will be your front and back of the book.
- Measure out enough room on the left side of the front piece and the right side of the back piece for binding. These will be areas that you will NOT be decorating/embellishing. (About 3/4″ to be safe.)
- Use your Cricut Design Studio Gypsy to weld together the child’s name using a font cartridge. Cut this out in you Cricut. Use your Cricut to cut out the word “Autographs” from a font cartridge. (If you don’t have a Cricut or die cutter, you can also use stickers, if you wish!) You will also need to cut out the Mickey head from Mickey and friends, and cut Cinderella from the Happily Ever After cartridge (or use the Jolee’s stickers if you want to cheat. *LOL*)
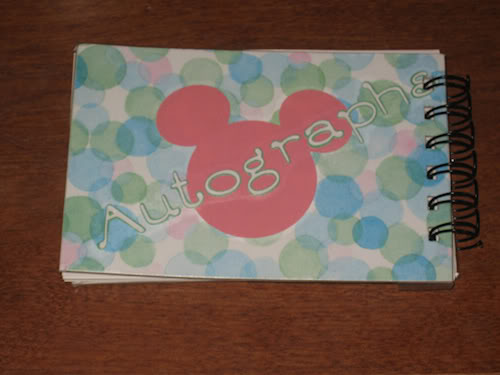
- Using the cut items, decorate the “front” and “back” of your book, again taking care to not put anything in the area to be bound. I layered the word “Autographs” over the Mickey head on the back, and put the Cinderella sticker set on the front with my daughter’s name. Embellish as desired using die cuts, stickers, etc.
- Cut out 2 pieces of contact paper, enough to cover the front and back with some extra to hang over the sides and seal on the other side. (This is very important, as Disney weather is unpredictable, and you might end up out in the rain. This will at least protect the covers.) Peel off the backing on the clear contact paper, and cover the patterned, decorated sides of the chipboard covers.
- Using the Bind-it-All, punch holes on the side of the chipboard covers (on the left for the front cover and on the right for the back cover.)
- If you haven’t already, cut out plain white paper (printer or copier paper will do just fine) to the same 4″x6″ size as the covers. Use the Bind-it-All to punch holes.
- Based on how thick your book is going to be, select the appropriate size 0-wires. Assemble the covers around the pages, and use the Bind-it-All to bind the book.
See another version: