One of the crafting topics I wanted to dip my toes into for a while has been sublimation. It’s much more efficient when it comes to decorating things like shirts and mugs and tumblers. Vinyl and even t-shirt vinyl can eventually come off. Sublimation becomes infused into the fabric or whatever medium you are using. Since I am going to be doing some personalized items soon for my daughter’s wedding, I wanted to test the process out first with something simple: mugs. As always, before we start, I am not getting compensated in an way for this. I am simply mentioning which brands I used, and linking when I can to help out those of you reading. 🙂 Also, for this, I used a dedicated convection oven. (You can alternatively use a Cricut or any other brand mug press.)
Supplies I used:
- Sublimation printer – I converted an Epson 2803 to use for sublimation. ANY NEW Epson Eco-Tank can be converted for use with sublimation, but you can not put the ink that comes with it in the printer. You have to only use sublimation ink. And once you use sublimation ink, you cannot go back to it being a regular printer. The pros? This is a much cheaper option than a traditional sublimation printer which can be well over a grand.
- Sublimation ink – As mentioned above, you cannot use regular ink. I used Happy Toner brand. With some other brands you have to use syringes and inject into the Eco-Tank system. With this one, it is designed just like Epson’s, and you insert the top in, and just squeeze. You can purchase it here.
- Sublimation mugs – I picked random ones on Amazon and they worked really well. The brand was Nubaka. You can get them here.
- Convection oven – Just a cheap one I picked up at BJs. (Although it IS way too small and I will upgrade to a bigger one when I can.) Note: It has to be a convection oven, and it must be a dedicated one you will be only using for this purpose. A regular toaster oven will not be suitable. And do not use the one you are cooking your family food in!!!
- Sublimation paper – You must print special paper to properly transfer the designs. I used HTVRONT’s sublimation paper. I personally love HTVRONT. They are one of my go-to brands for vinyl, HTV, etc. (And they are coming out with an auto-press this fall that completely knocks Cricut’s press for a loop price wise!) You can get their paper here.
- Heat tape – Keeping a tight seal is a must! Regular tape will not work in high heat conditions, so this tape is what you will need. You can buy it here. (Also, consider getting a tape dispenser to make it easier!)
- Heat safe pad – This is a must to have something to put your mug on when it comes out of the oven. You can either use the one that comes with your Cricut Easy Press or other similar press if you have one, or I picked up the Nicapa heat press mat at Amazon. You can get it here.
- Heat gloves – So I have to honestly do more research on this one. They protected my hands…to an extent. But not as much as I would have liked. I bought these on Amazon. I will probably look for better ones.
- Oven thermometer – I know, it seems weird. But toaster ovens are notoriously bad at being accurate. I had to crank the oven knob up much higher to get it to where the temp needed to be. I got mine on Amazon here.
- Silicone wrap – This is used to wrap around the mug to keep the design tight and hold in heat. I bought a 3 pack that does 11 oz, 15 oz, and tapered coffee mugs. You can get it here. (You can alternatively get sublimation shrink wrap. This comes in many sizes for many objects and serves the same function.)
- Scissors or paper trimmer
I know, I know. A lot of supplies. But, the larger items like the printer and oven are starting out stuff that are one off items to set up. (The same with things like the thermometer, heat gloves, heat safe pad, and silicone wrap.) But now we can get down to the project.
If you have not set up your sublimation printer, stop here. This will not help you do that. There are tutorials out there to help. (But please, I will repeat, if you have an Epson Eco-Tank, do NOT put the ink that comes with the printer in. Put it aside, throw it away, give it away, whatever. You have to use only sublimation ink.)
If you have set up your sublimation printer, let’s continue. 🙂
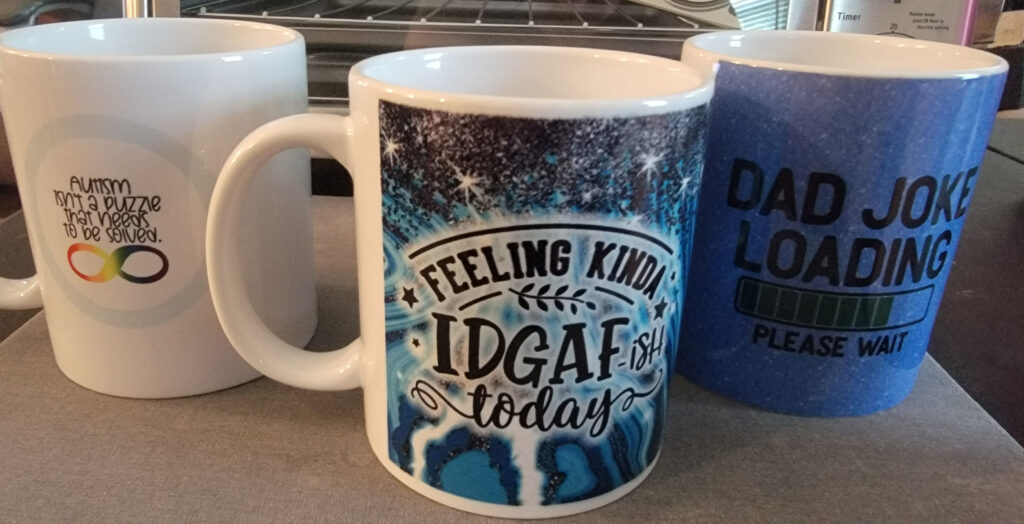
The first thing I did was pick a design. I think the easiest of the 3 would be the autism mug I did for Kenzie, which is on the left. If you want to make the design, it is free (1 credit) for Plus members on Design Bundles. You can download it here. If you are not a Plus member, Design Bundles has a LOT of free designs that do not require you to be a Plus member to download. It is a great way to get SVG and sublimation designs (And lots of other stuff, including embroidery files, as well!)
Once you have chosen a mug design, open it into whichever program you are using. (i.e. Silhouette Studio, Cricut’s Design Space, Corel’s Paint Shop Pro, PhotoShop, etc.) Alternatively, you can also create your own mug design! Your design should be 9.125″ x 3.5″ in size.
Print your design to your sublimation printer on sublimation paper. Your design may look not very vibrant in color. This is normal! It will look better when sublimated.
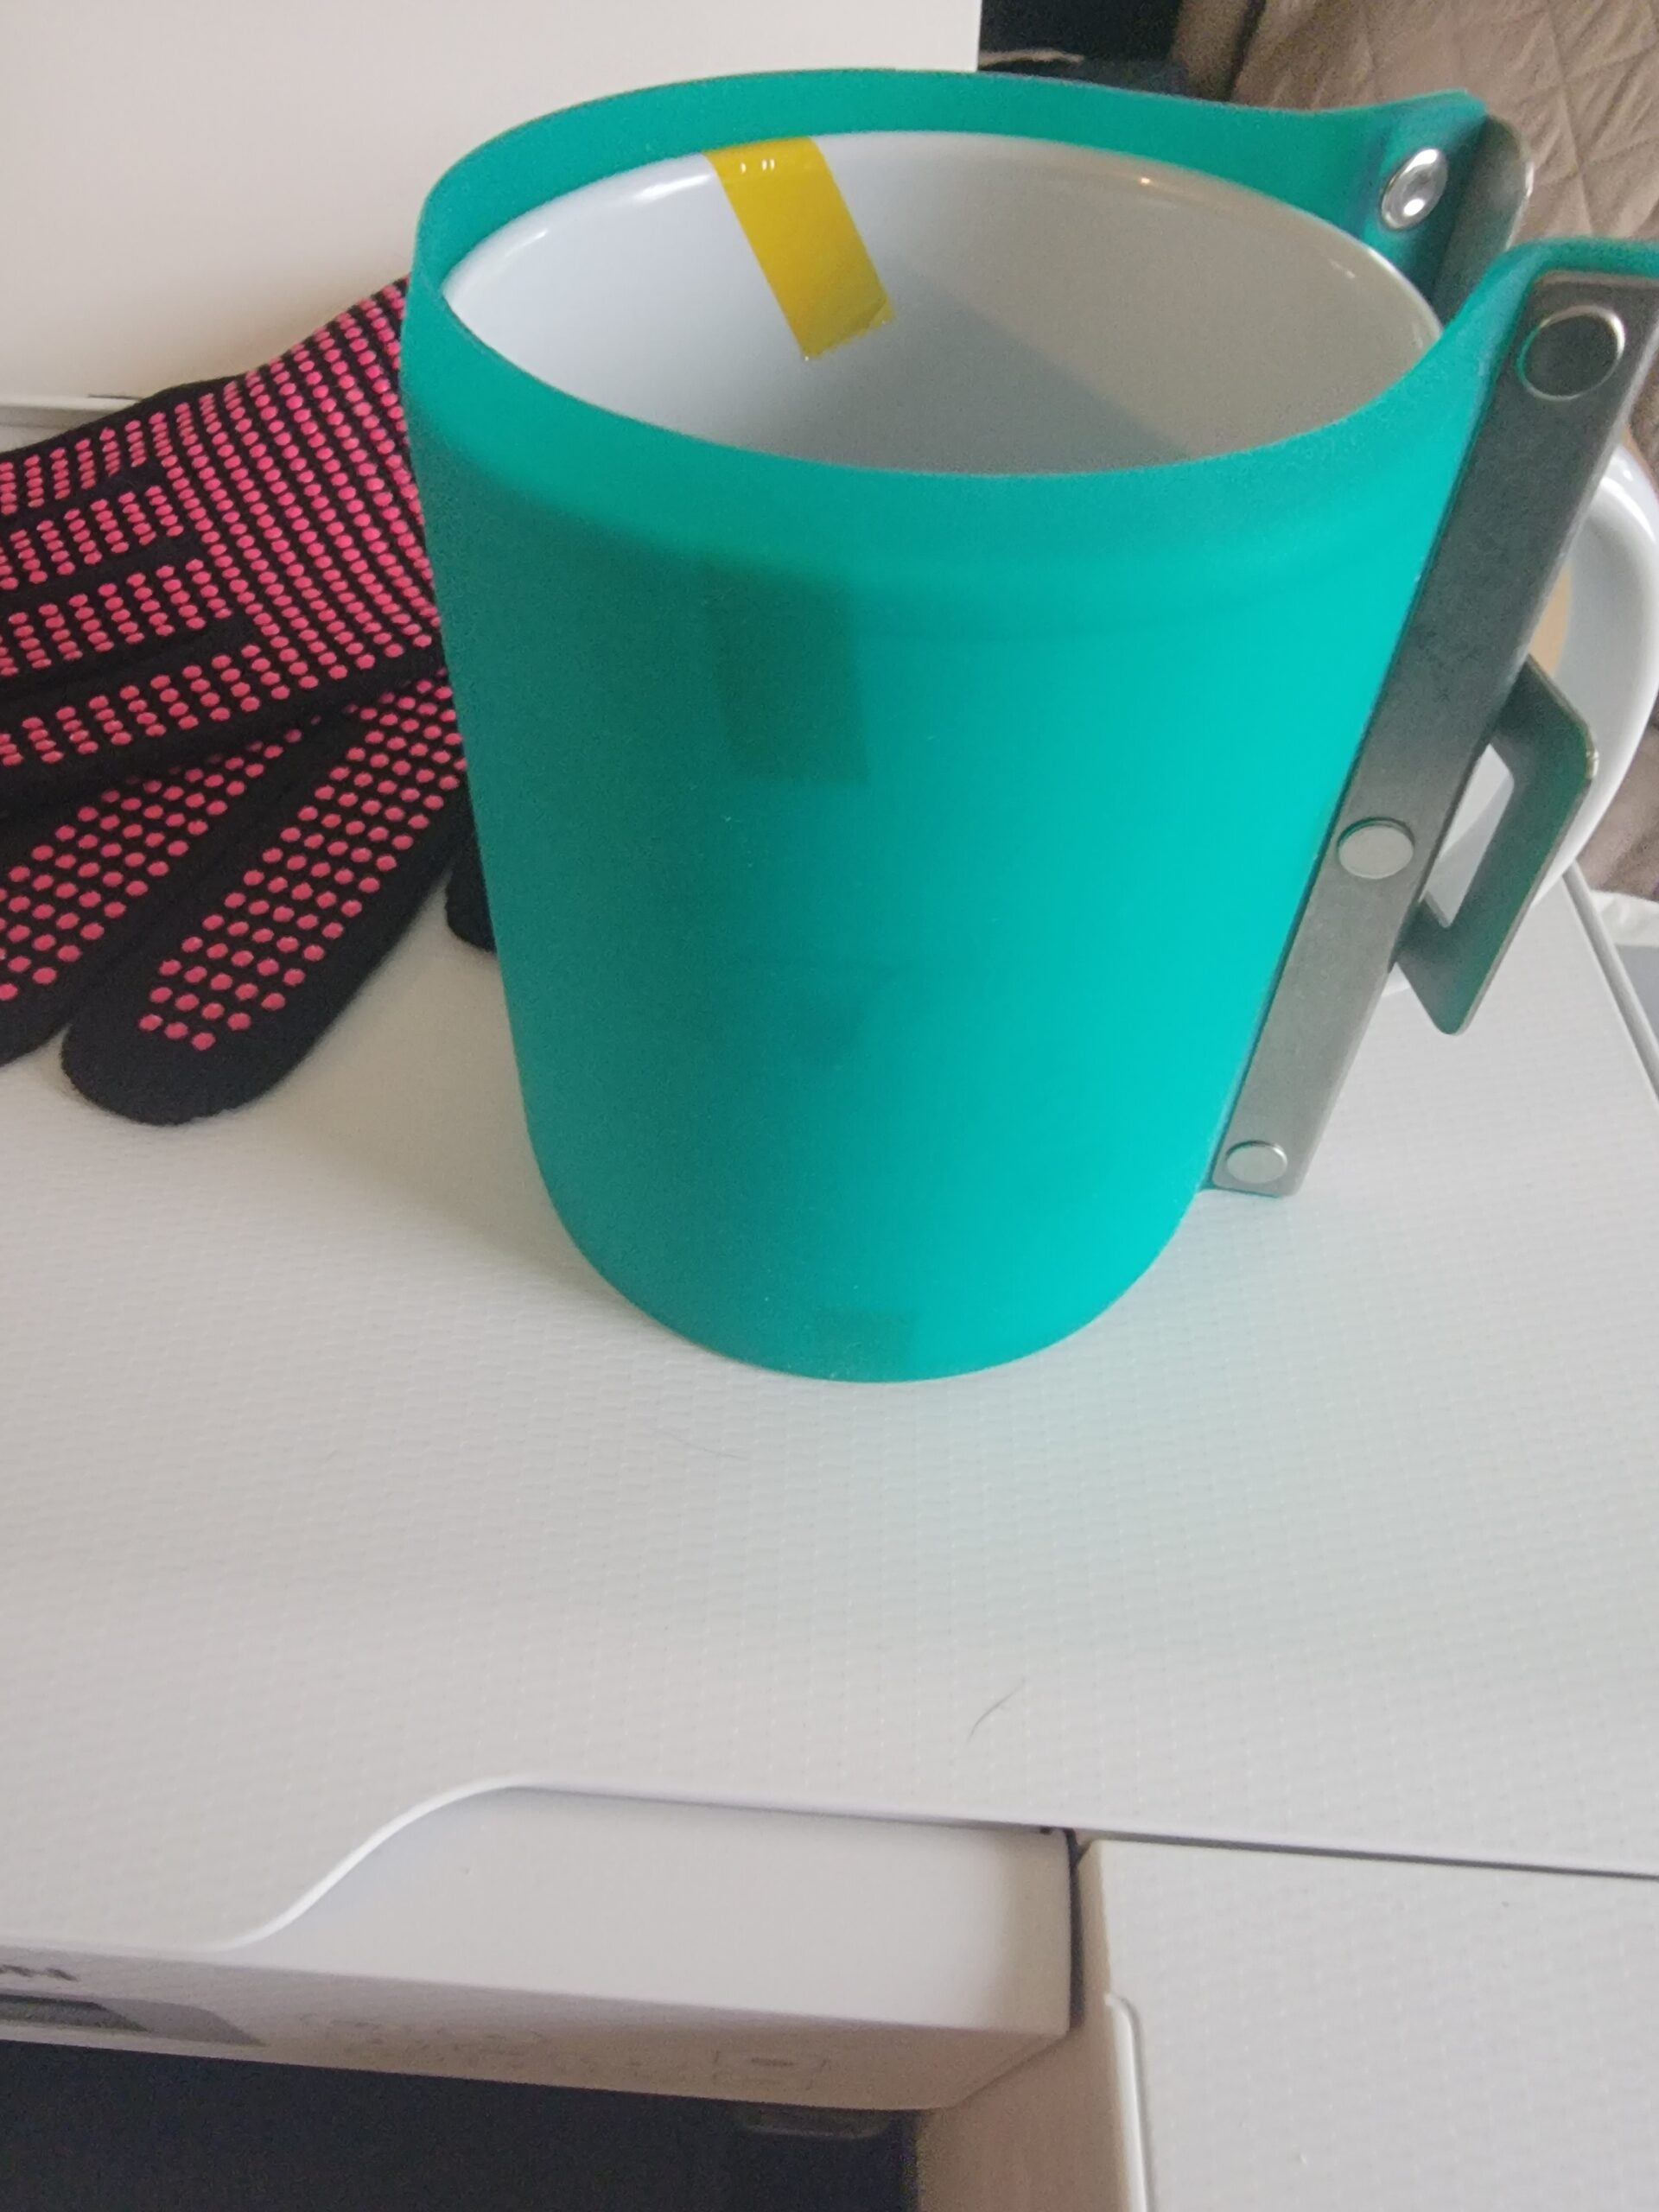
You will now trim your design. you don’t want a whole lot of excess around your design to tape around the edges or it could look really bad on your mug. When trimmed, use the heat tape to tape it very firmly around the mug. It should look something like this:

Then, you will want to put the silicone wrap around the mug. It will look like this:
Once that is complete, pre-heat the oven to 400 degrees. Use the oven thermometer to make sure it is the accurate temperature. Adjust the temperature as necessary. Once it is the correct temperature, use the heat gloves to put the mug in the oven. Bake for about 15 minutes.
Remove from oven. Allow to cool for a few minutes and carefully, with gloves on, unhook silicone wrap. Carefully (I used a hooked needle-nose tweezer, careful not to scratch the mug) remove the tape and paper. This will reveal the design, which will have transferred from the paper to the mug.
Here are the 3 finished mugs I made. (Kenzie’s was the one on the left, Brian’s the one on the right, and the one in the middle for my sister/best friend. )

Sublimated mugs are safe to put in the dishwasher, unlike ones done with vinyl, which have to be handwashed. It makes it a great option for both the DIY crafter as well as the aspiring ETSY seller to add to their crafting arsenal.
Happy crafting!